
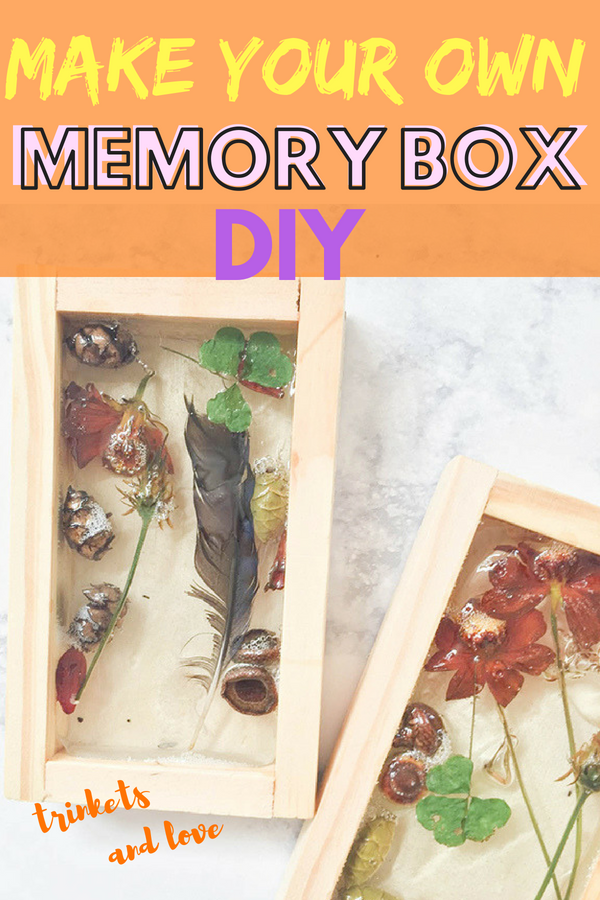
MEMORY BOX DIY
As summer winds down you may find yourself with little treasures and souvenirs that you gathered on your travels. Maybe you went to National Park, and you find yourself with acorns and leaves you couldn’t part with? Perhaps you went to your favorite beach, and you have a bunch of stones you don’t know what to do with? Maybe you left the country or went to a mouse-themed amusement park with a lot of cute trinkets you had to have?
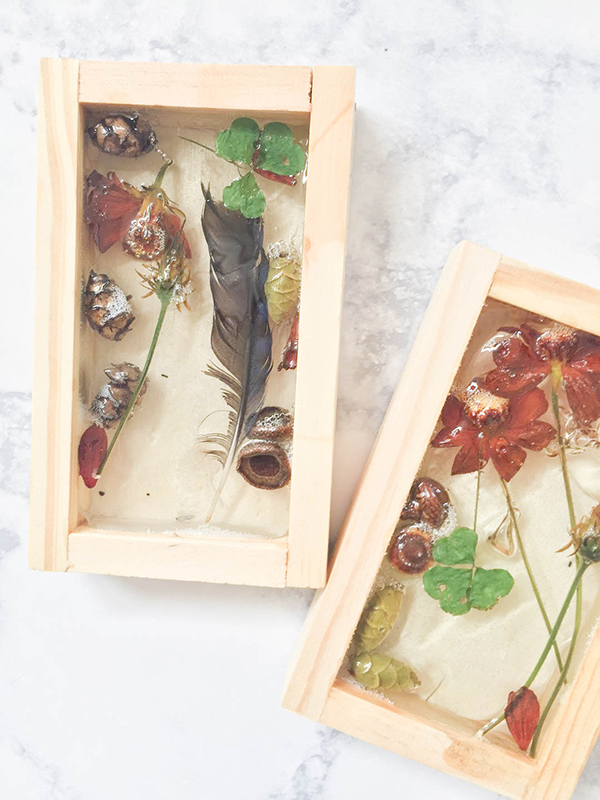
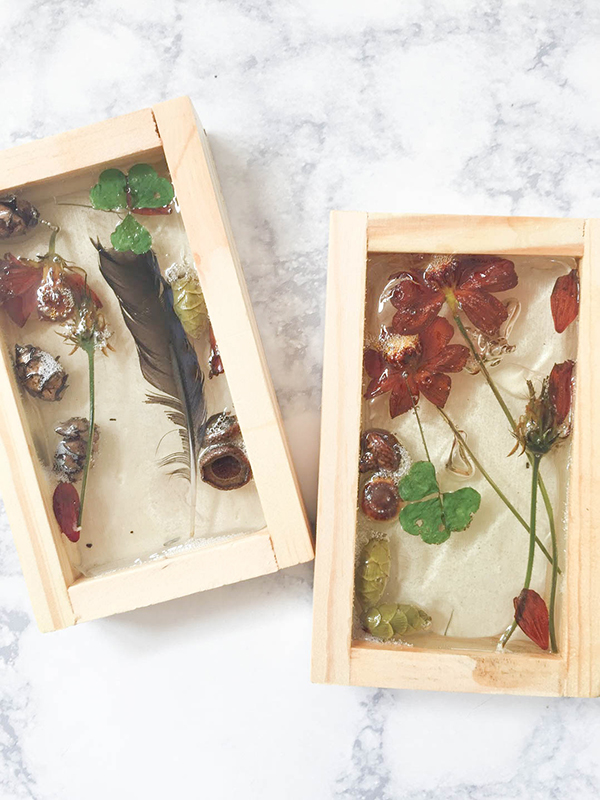
With my memory box DIY, I will show you how to preserve these mementos, keepsakes, and trinkets from your travels. In this DIY you will see that through the processes of encapsulating your souvenirs, you can transform what is usually thrown in a drawer, into a beautiful display!
Didn’t go on an adventure this summer? That’s okay; you still have time! You can make a memory box to capture items from your own backyard! In my post My Summer Bucket List, I mentioned the concept of Shinrin – Yoku. My memory box DIY is a perfect opportunity to go out an connect with nature. Just step out your door and let nature’s beauty tell you what to put in your memory box!
Supplies:
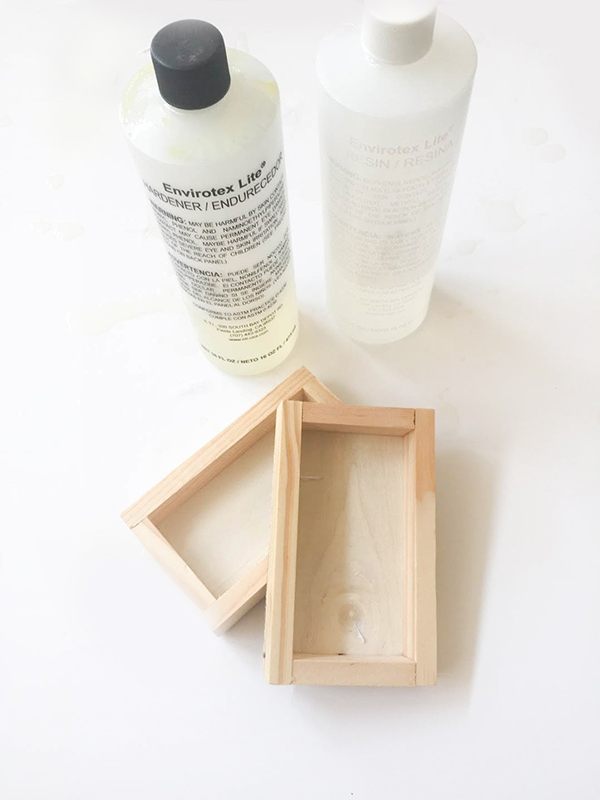
Shadowboxes 3″x5″ (I purchased mine at Michaels Craft Store)
Resin with mixing container and stir stick
Toothpick
Nature / travel mementos
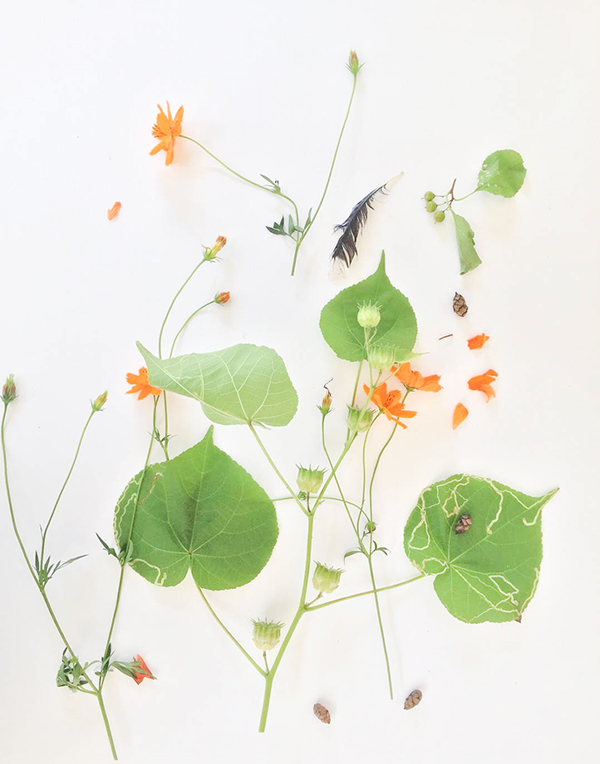
Ideas for mementos:
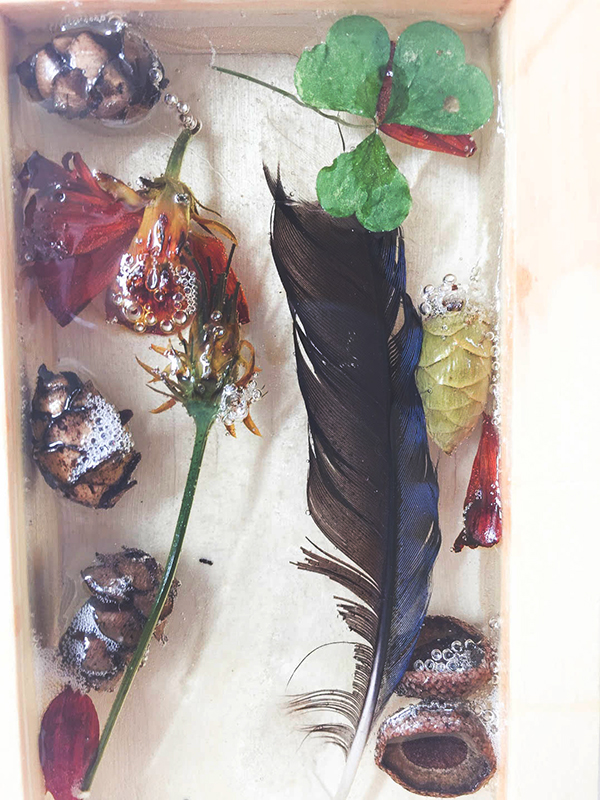
Pressed flowers and leaves
Acorns
Pinecones
Found butterfly wings
Stones
Feathers
Twigs and roots
Coins
Enamel Pins
Memory Box DIY:
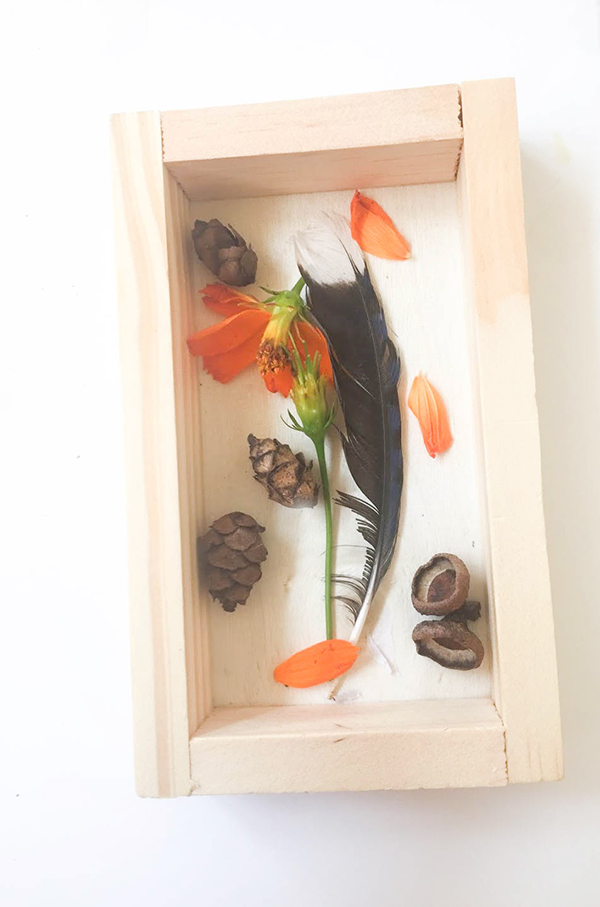
01. Whether you are on vacation, going for a hike, or in your own backyard, look for items that you find meaningful and beautiful. Keep these mementos in a safe place
02. Wash or prepare do any other necessary actions to prepare mementos for the shadowbox
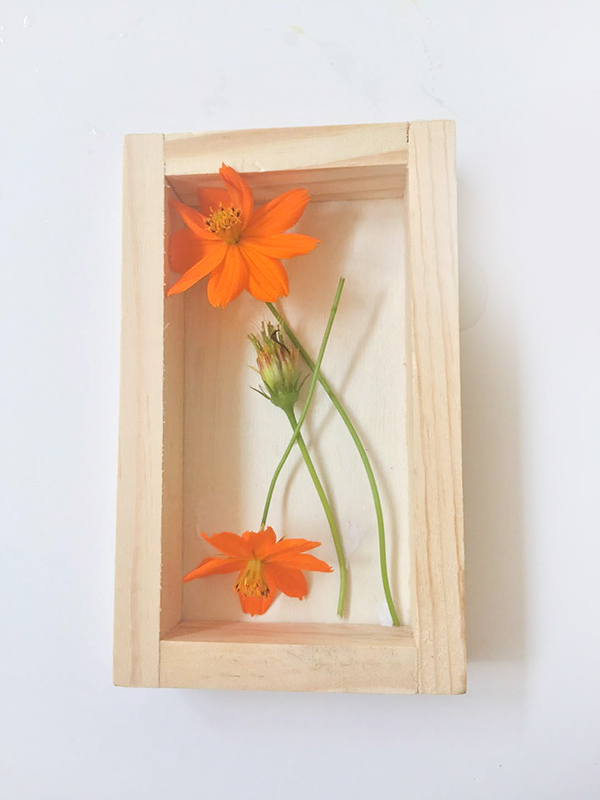
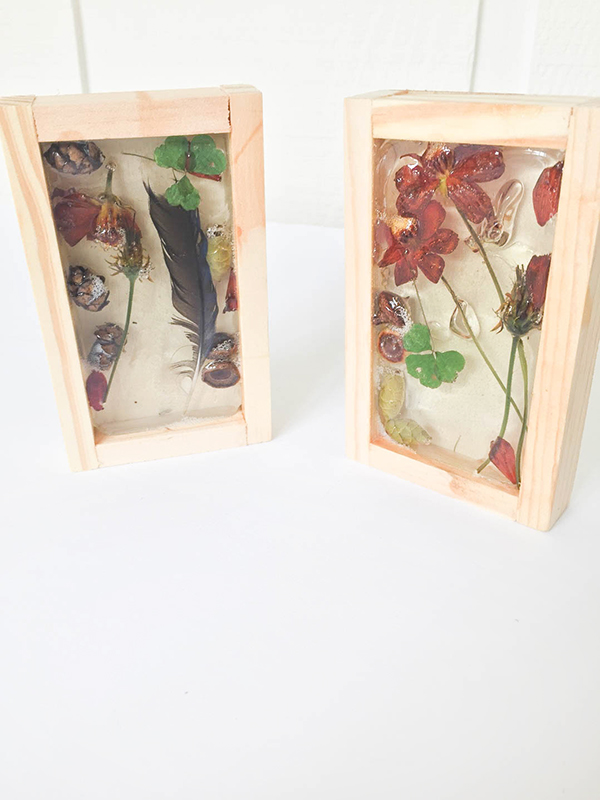
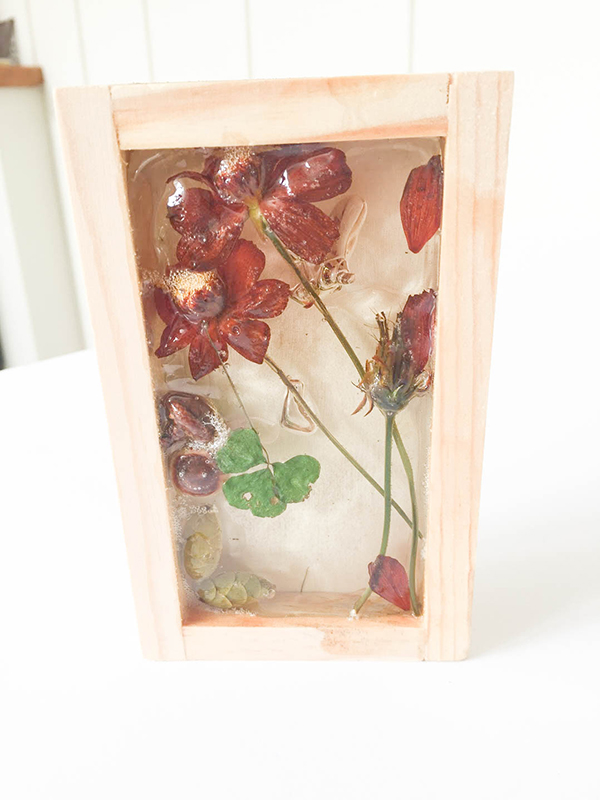
03. Layout the mementos in the shadow box to find your ideal placement
04. Lay down newspaper or tarp where you plan on mixing and pouring the resin
05. Mix the resin based on your product’s instructions
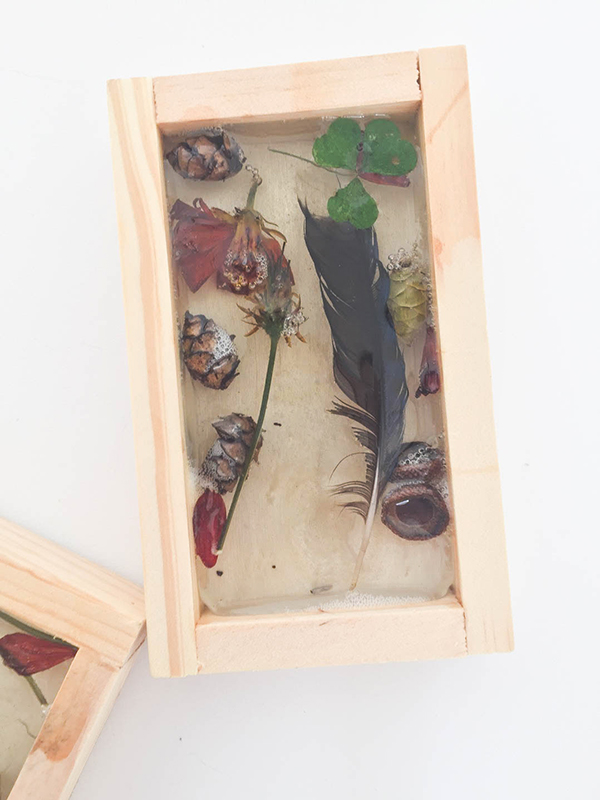
06. Place your first layer of mementos in the shadow box and then pour on the first layer of resin
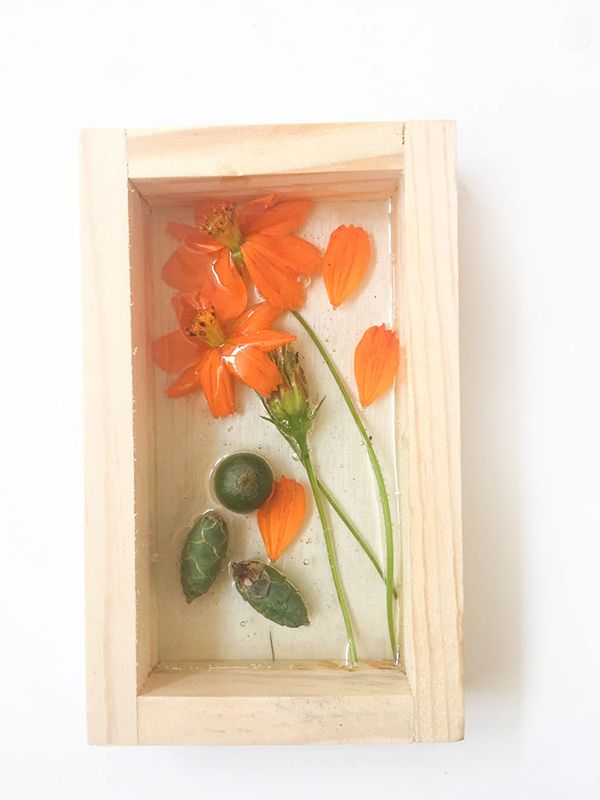
07. If needed, use the toothpick to move items back to their original placement
08. Place your second layer of mementos and repeat the previous resin steps
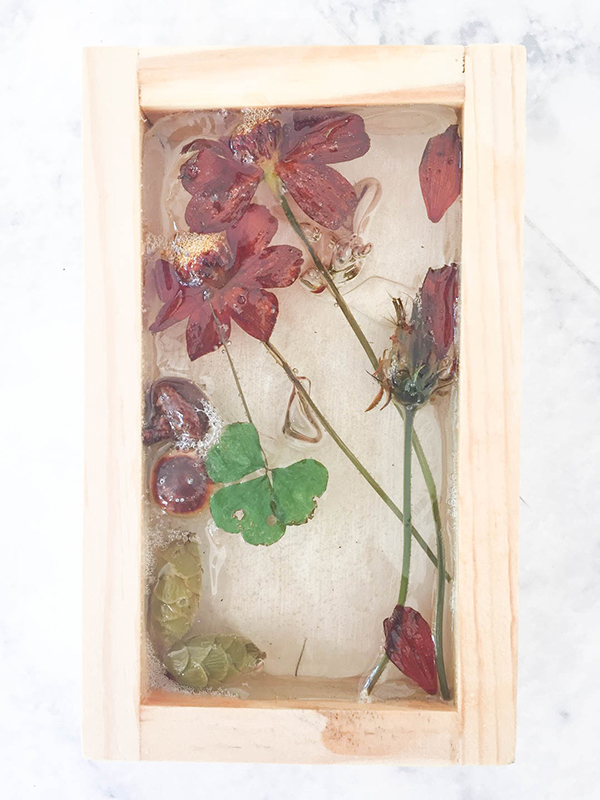
09. Repeat steps 6-7 for as many layers desired but making sure to fill the box to the brim with resin by the end
10. Set aside to dry based on product’s instructions. I didn’t touch mine for at least 24 hours
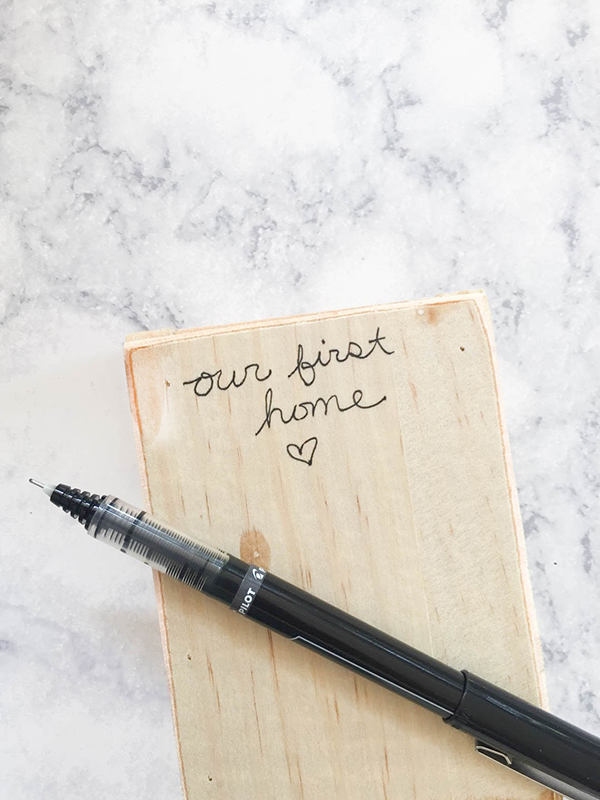
11. Once dry, write on the back of the box where the mementos came from. Alternatively, you can glue on a map, or write a little story about the day you found your items
I hope you enjoyed this memory box DIY! This would be a great tradition for your home! Just think of it, a shelf full of little memory boxes for each trip you take. It would also be an excellent gift for someone you shared your adventure with!
I’m so grateful for the opportunity to share what I make with others! Thanks for stopping by my blog! Here are a few posts you may enjoy: DIY Bird Magnets, DIY Tropical Leaf Necklace, and DIY Pompom Serving Tray!
For more fun ideas, follow me on Pinterest, Instagram, Twitter, and Facebook!


8 Comments
Rebecca
August 30, 2018 at 2:46 pm
Love this idea! I have a few little trinkets I’ve been trying to decide how to display and I think this would be the perfect way to display them and add a little DIY art to our home.
Deanna
August 30, 2018 at 3:32 pm
I’m glad you like it, Rebecca!
Atila Irmes
August 30, 2018 at 3:22 pm
Deanna, this is such an awesome idea, love it!
Deanna
August 30, 2018 at 3:32 pm
I’m so glad that you enjoyed it!
Kelsey
August 30, 2018 at 5:24 pm
Those are absolutely beautiful!!
Deanna
August 30, 2018 at 5:52 pm
Thanks, Kelsey!!
Darcey
August 30, 2018 at 11:44 pm
What a great idea! This would make a nice gift as well. Thanks for sharing.
Deanna
August 31, 2018 at 4:44 pm
Thanks, Darcey! I love the idea of gifting these as well! I think it would make a great little stocking stuffer for someone you went on a trip with.
Comments are closed.