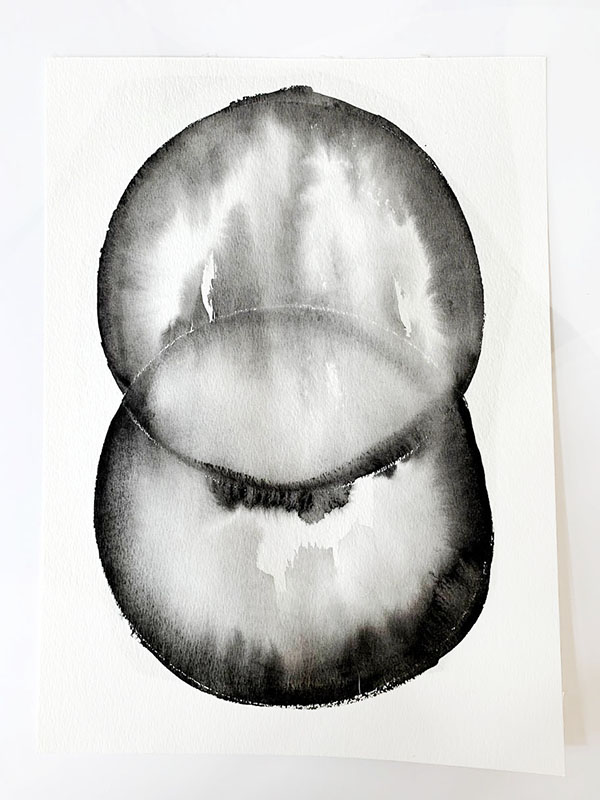
Black and White Abstract Watercolor DIY
Learn how to make your own watercolor DIY abstract art. This process is simple and fast! you aren’t going to want to stop making your own abstract art pieces!
Do you love shopping for art pieces for your home? If so have you ever thought about making your own before? Watercolor is the perfect medium to start exploring making your own interior decoration. With watercolors, you can play with transparent colors, build up dark and light tones, and they can be used on a variety of surfaces and papers.
I have have been wanting to create an abstract watercolor piece for some time now, and I have come up with a fun technique that will show you how to make a lush and textured black and white watercolor abstract art piece.
I’m a big fan of fast and cheap projects that look expensive, and I couldn’t be happier with the result! Who knew a crayon and black paint could create something so modern and unique?
Supplies:
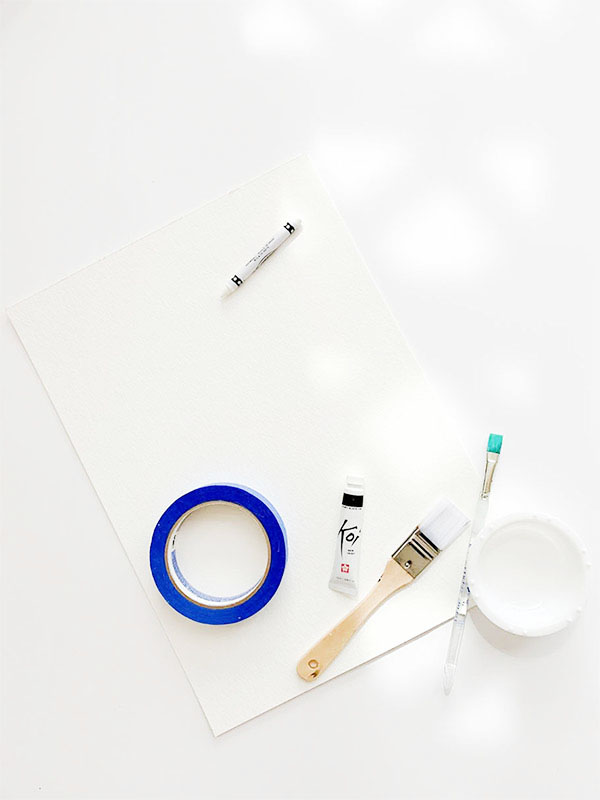
A Bowl
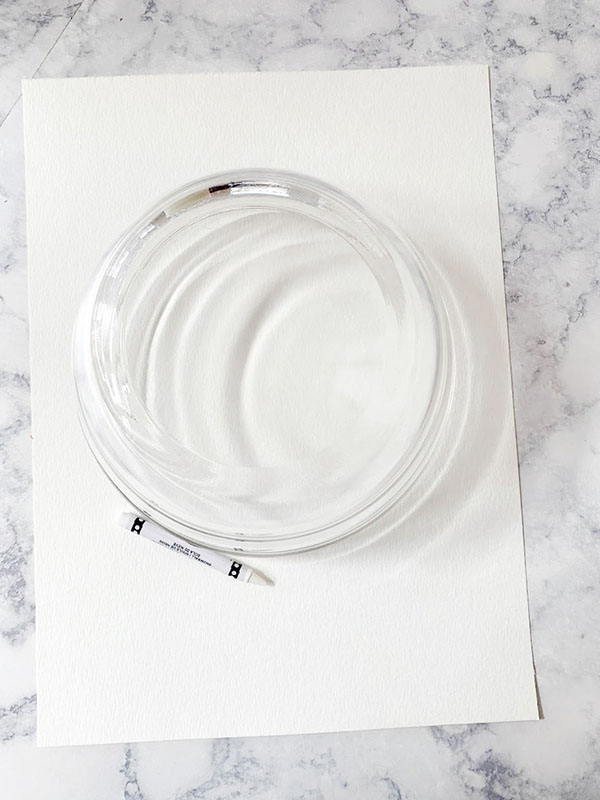
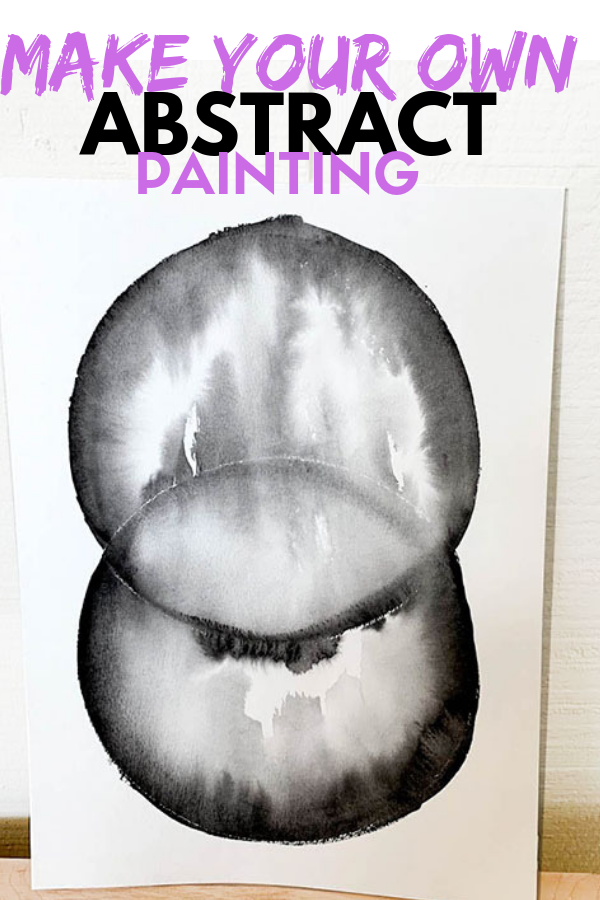
1. To start, grab a bowl (or another circular object) and place it on the upper part of your watercolor paper
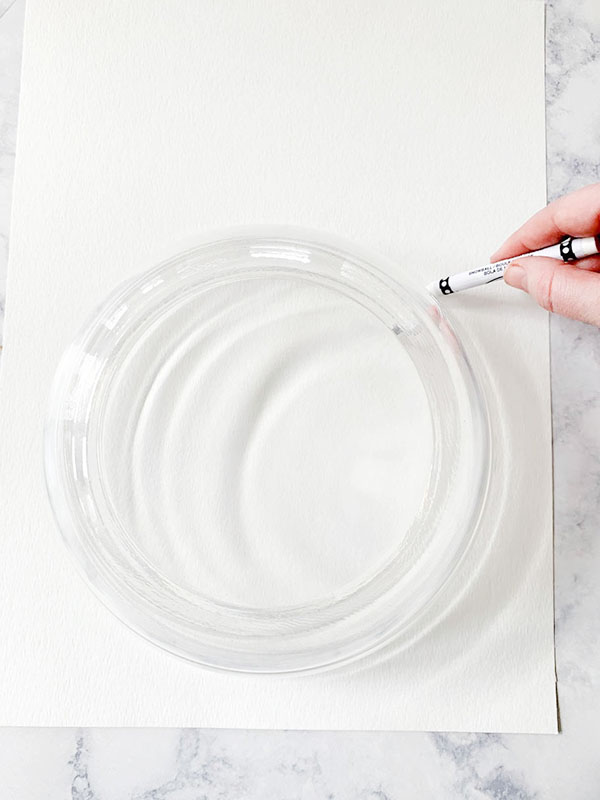
2. Take your white crayon, and trace around the bowl
3. Move the bowl down lower on the paper, but make sure it overlaps the first circle, and trace around the bowl with crayon
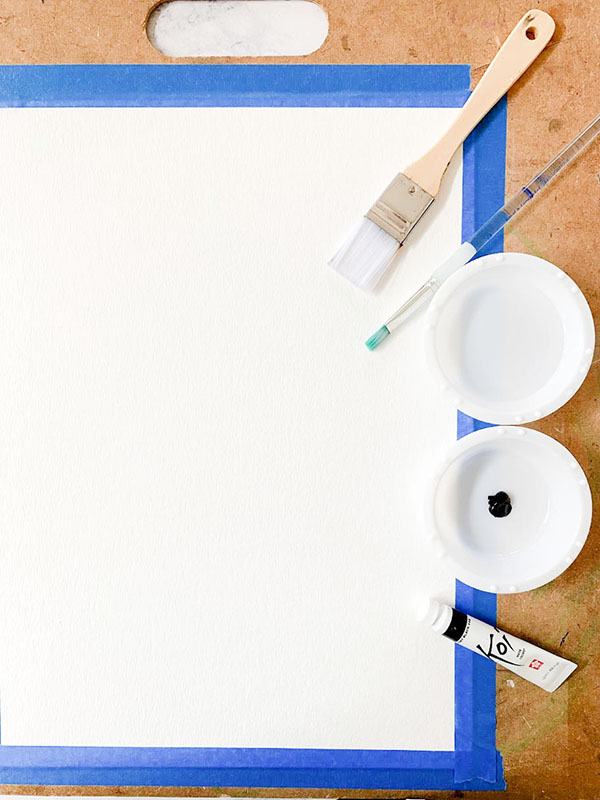
4. Tape your watercolor paper to a flat surface. This will ensure that your paper will stay flat, instead of buckling when it is wet
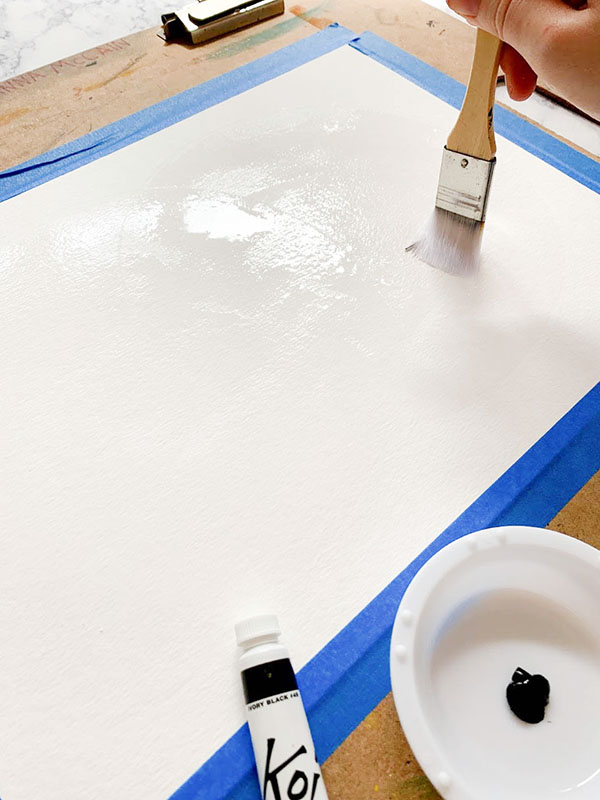
5. Dip your larger brush in the water, and brush water inside the two circles.
Note: you want the paper to be saturated, but not with water running everywhere
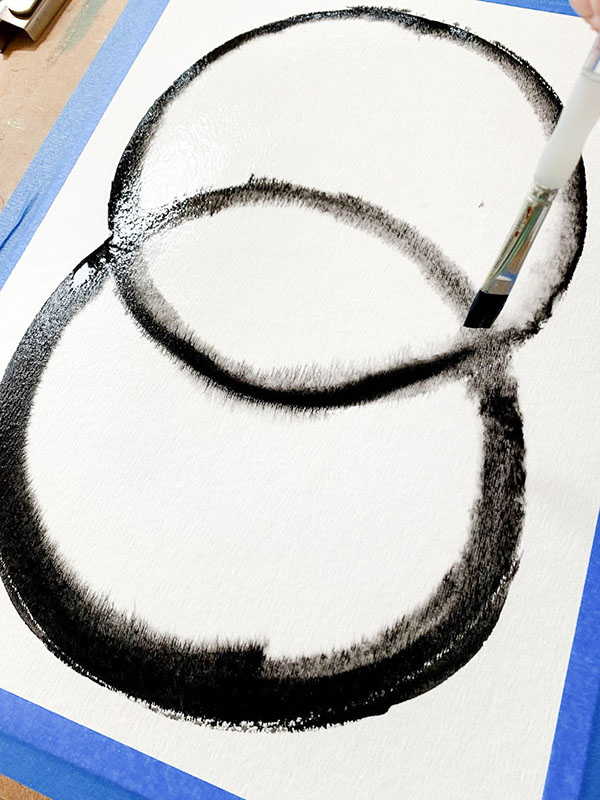
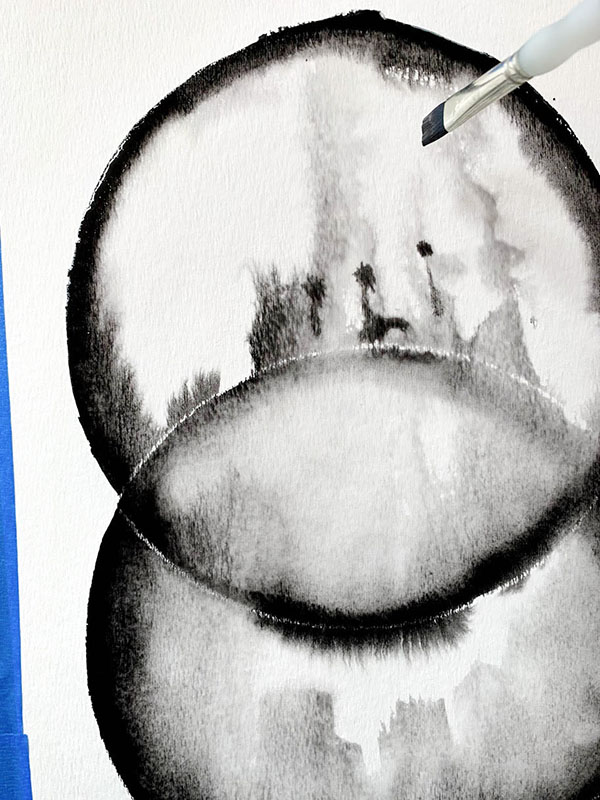
6. With your smaller paint brush, trace around the outline of the circles with black
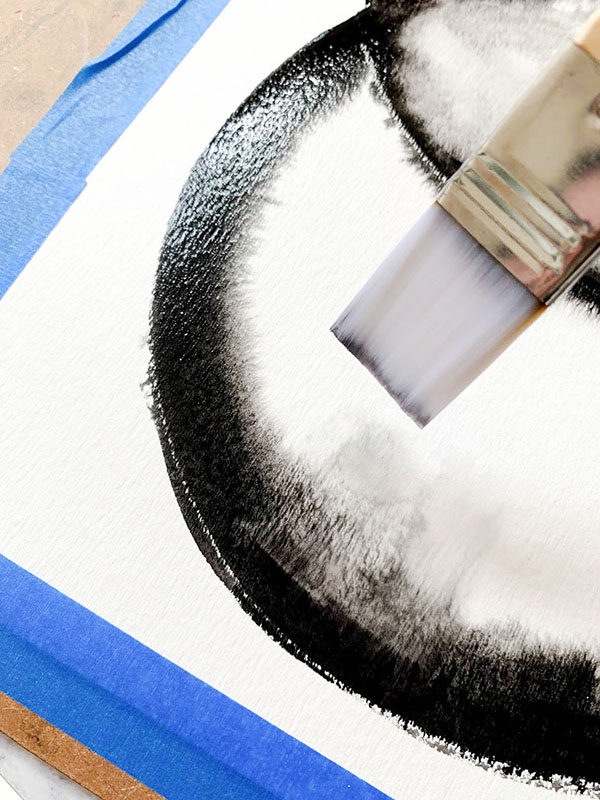
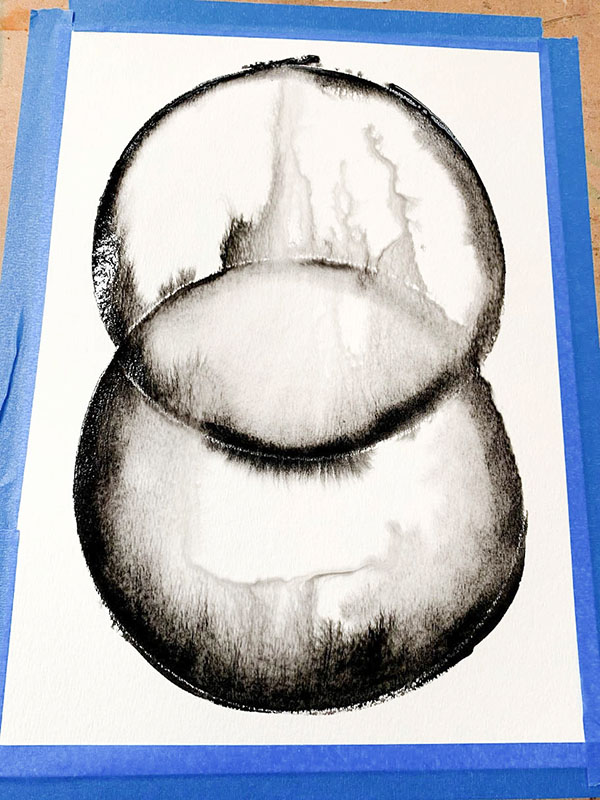
7. Begin to manipulate the paint to your liking. Pull it upward with your brush. Create dribble effects by tilting the paper in different directions. Bring in more paint to darken areas, or drag paint to lighten areas
8. Do not remove paint until your painting is dry. You may have noticed some buckling or puffing up on wet areas, but since you taped down the surface, it will depuff and return to normal when dry
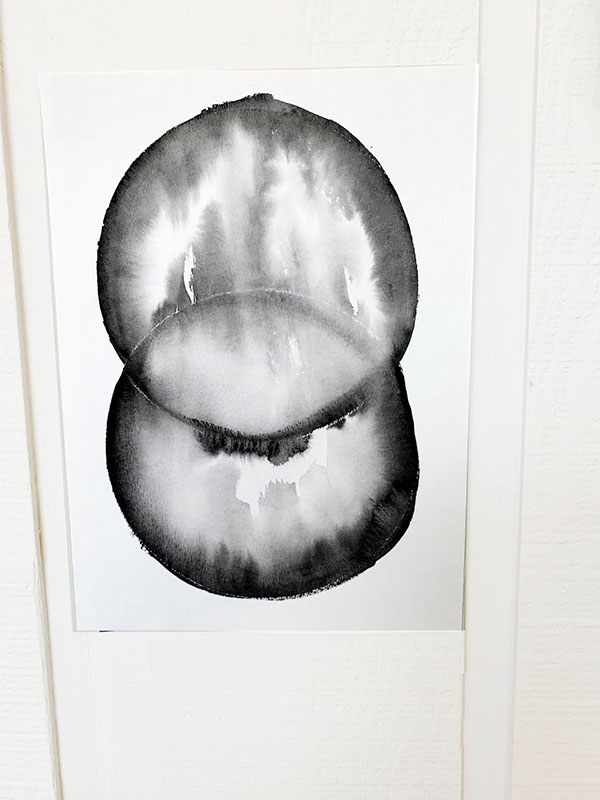
9. Hang up and enjoy your minimal and modern piece of artwork!
Final Shots –
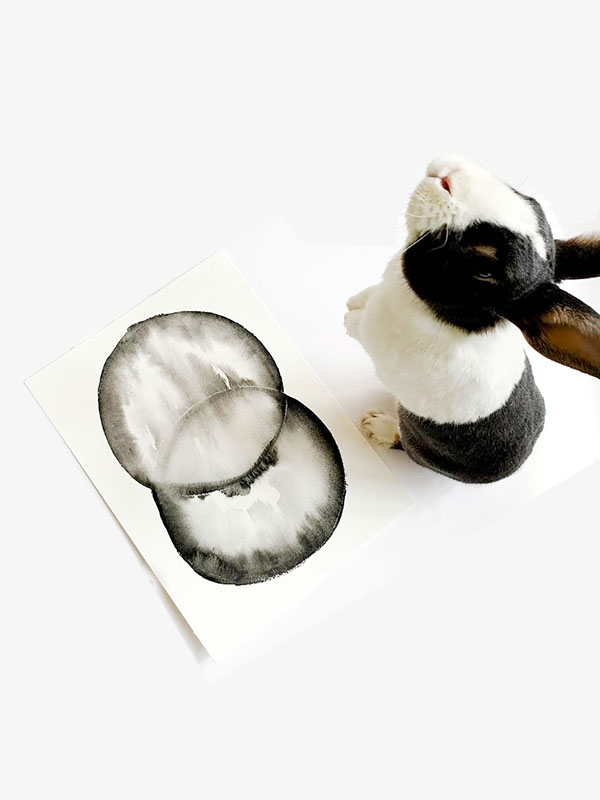
I’m so grateful for the opportunity to share what I make with others! Thanks for stopping by my blog! If you enjoyed my Black and White Watercolor Abstract DIY, here are a few posts you may like: DIY Jewelry Dish, DIY Scandinavian Clay Coasters, and DIY Personalized Letter Wall Art!