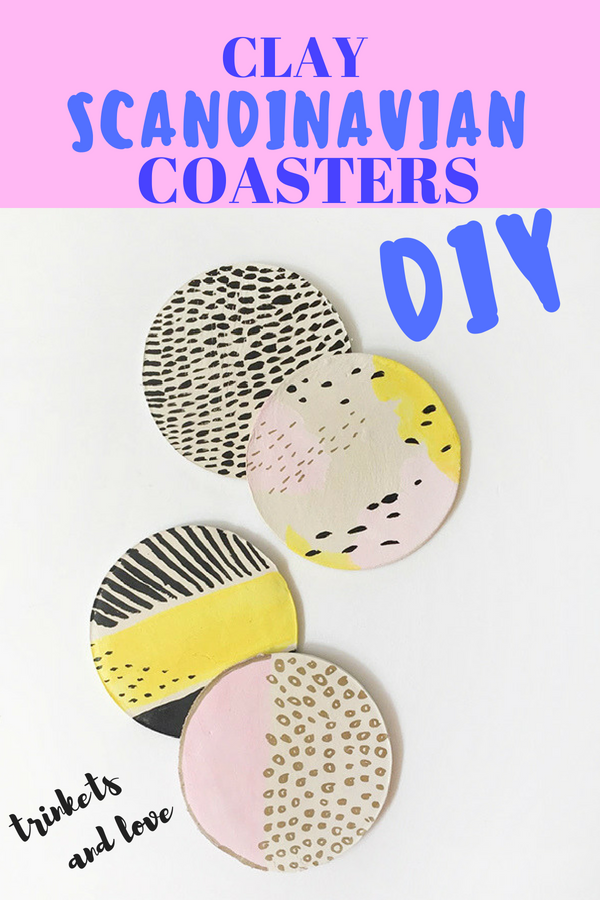
CLAY SCANDINAVIAN COASTERS
Are you taking time to slow down and enjoy the simpler things in life? As you know I’m all about finding ways to slow down and relax. Self-care comes in many shapes and sizes, and today I am embracing one of the small joys in life, a nice cold glass of lemonade on a warm summer’s day. Is there anything more iconic than the sound of ice cubes clacking together, and beads of condensation dripping off a glass, while you cool yourself down? Of course, condensation means rings on your lovely table, and summer is too relaxing to have to worry about that.
That brings us to today’s tutorial. Instead of buying a dull set of coasters to rest my summery drinks on, I decided to make my very own set. If you have been reading my blog for a while, you’ll notice that I love minimal and graphic patterns. I love pairing geometric patterns with bold colors, and Midcentury Modern and Scandinavian design inspires me.
When designing my clay Scandinavian coasters, I wanted to make something that had a homey and expensive feeling to it. To do achieve this, I went with a similar color pallet and reused similar design elements throughout the set. Below you will find the steps that I used to achieve these patterns, but the great thing about this DIY is you can really make it your own style! Go with colors and patterns you love! This clay coaster DIY is so easy, and if you are like me, you’ll want to make tons of them!
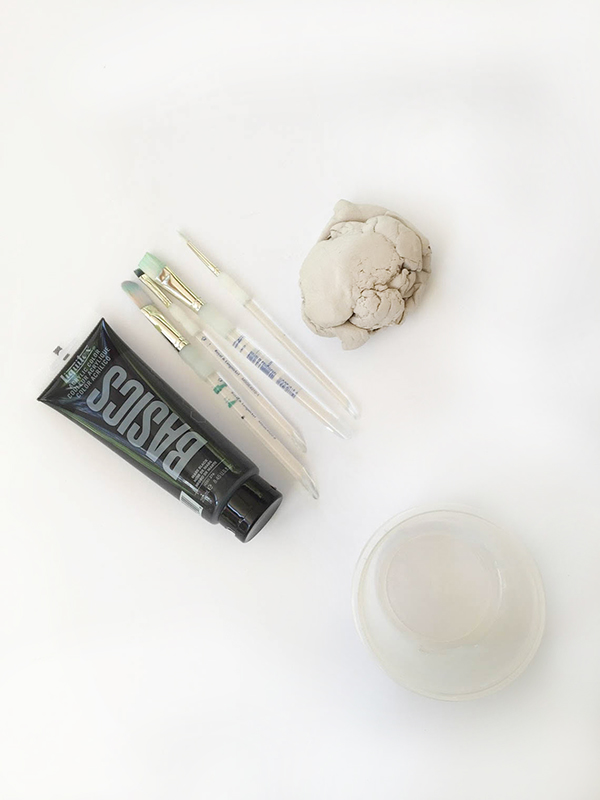
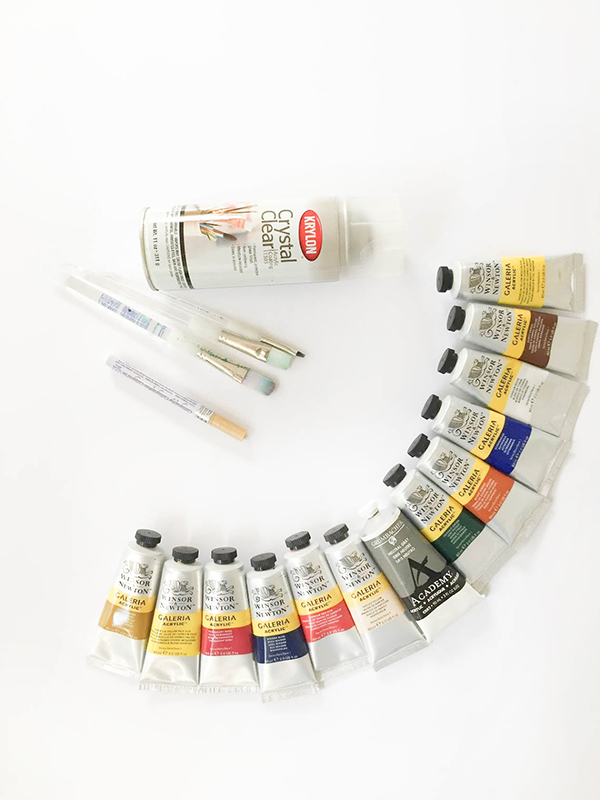
Supplies:
Air Clay
Acrylic Paints
Paintbrushes
Something circular to cut out coasters
Gold Marker (Optional)
Crystal Clear
Clay Scandinavian Coasters
01. Knead the air clay and then roll it out into a sheet about 0.39 inches thick
02. Using something circular (I used a food container), cut out the coasters out of the clay. You want to make sure that the size of the clay is larger than your average cup or mug

03. Set aside to dry
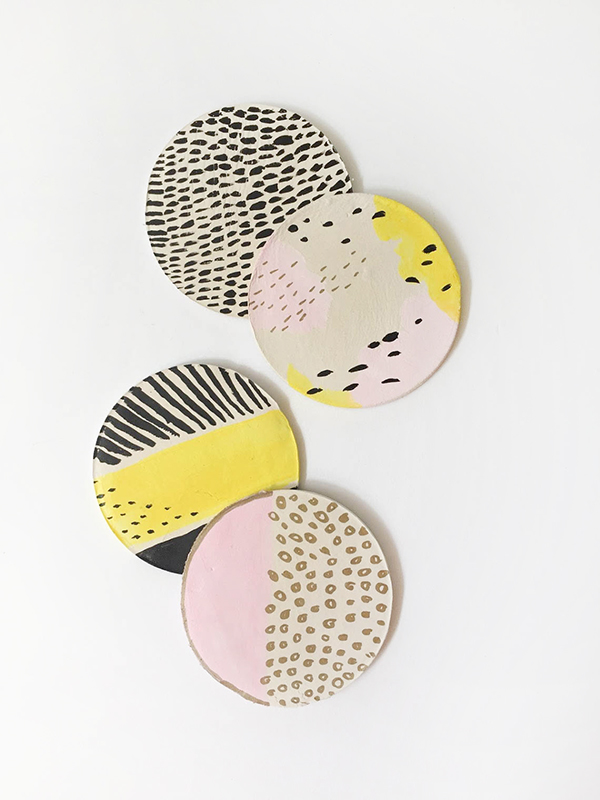
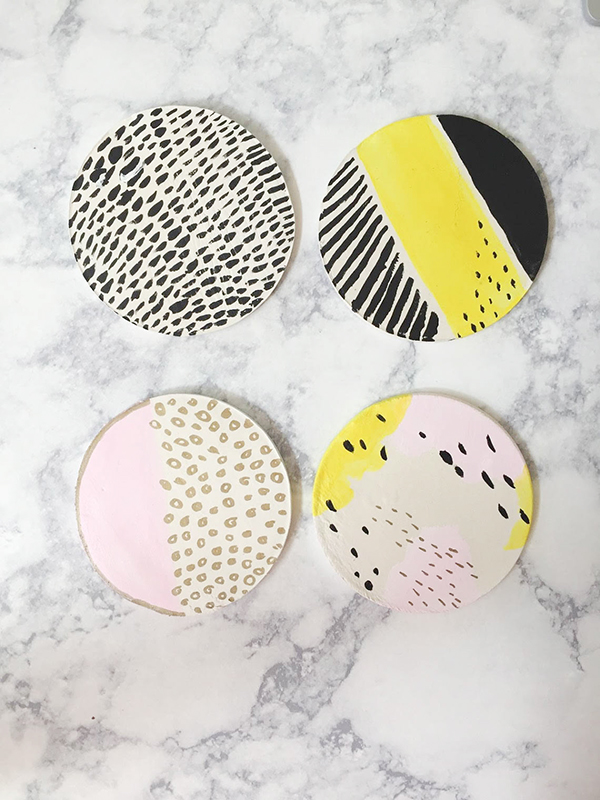
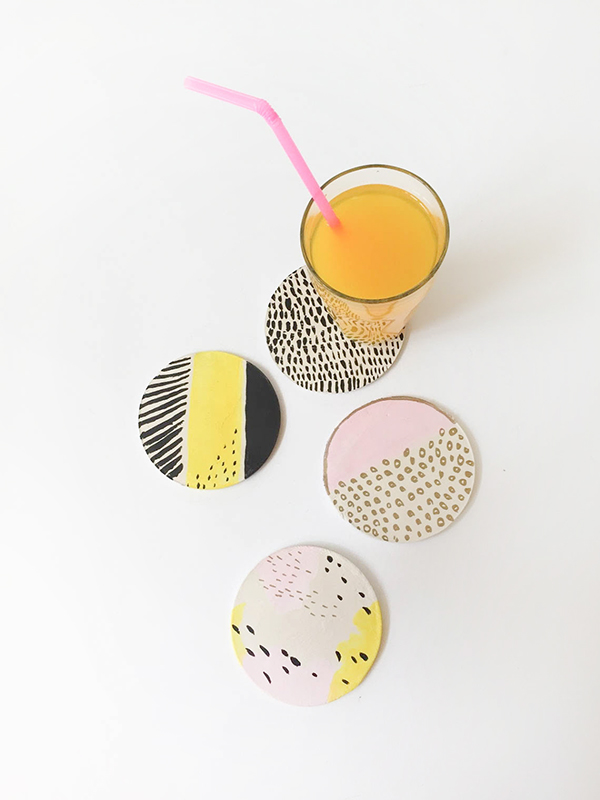
04. To decorate my coasters, I used a color scheme of black, pink, yellow, and gold. As always, I encourage you to choose a color scheme that makes your heart happy!
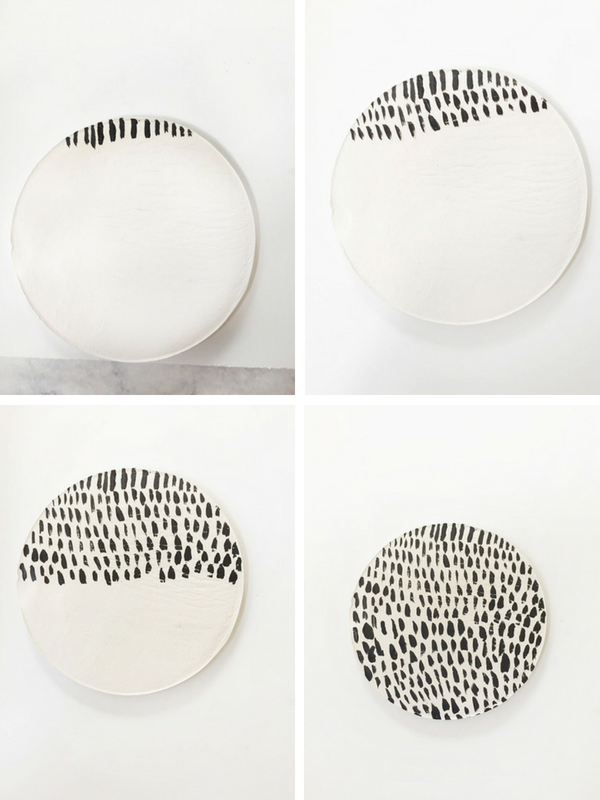
The first design is super easy! Start making dashes in a line. As you can see the dashes do not have to be uniform, in fact, I would just try to keep them about the same length. I love the quirkiness of this handmade pattern look.
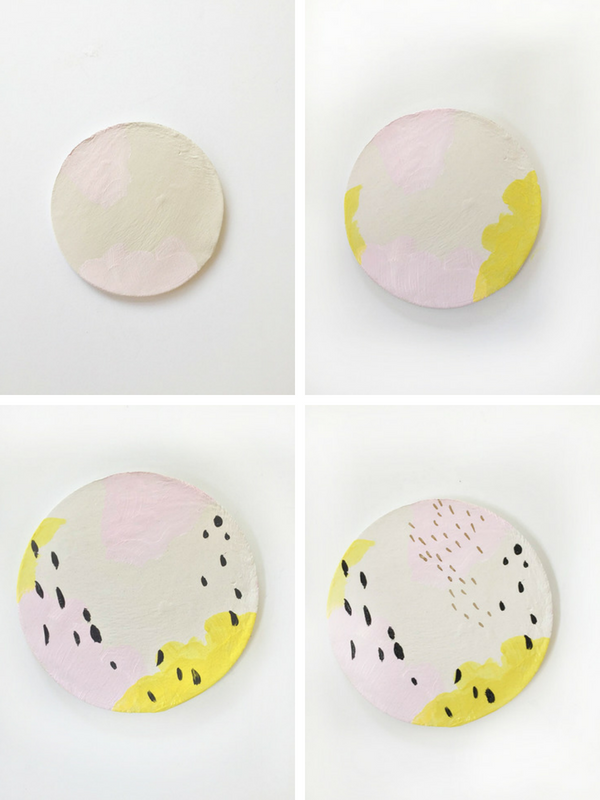
For the second design, you can see that I started with two pink splotches on opposite sides of each other for balance. Next, I did the same with the yellow. I came in the black dots, and then I added the gold flecks.
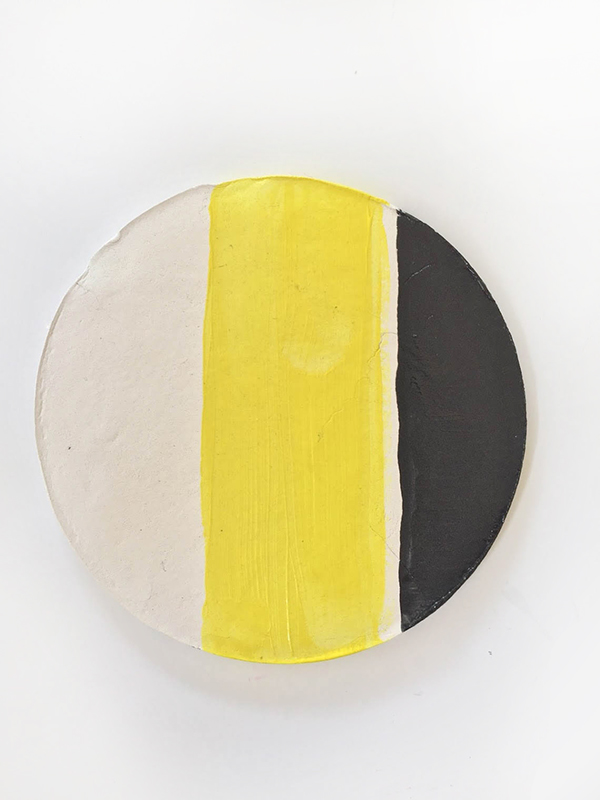
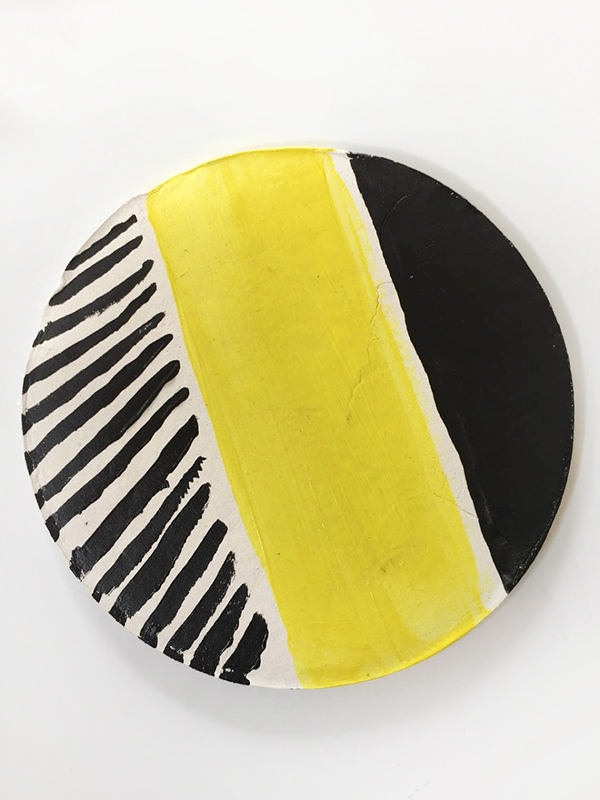
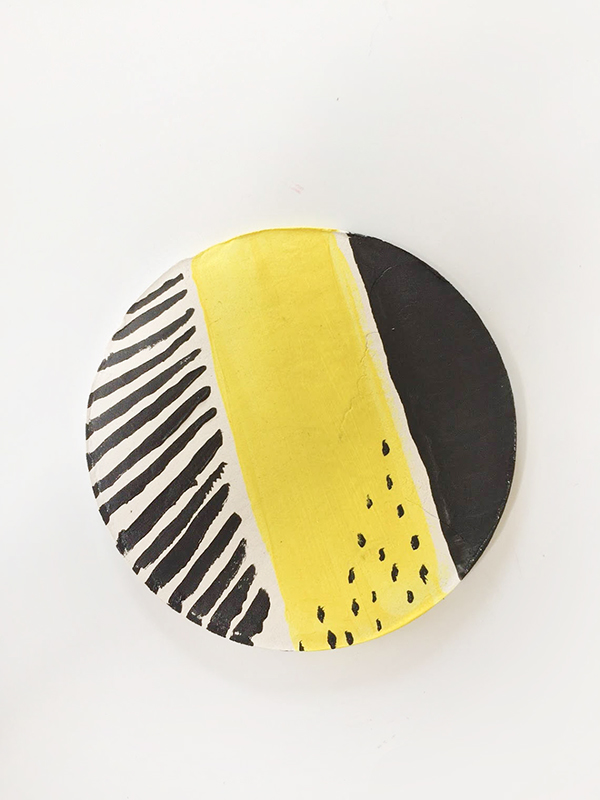
For the third design, I painted a black strip on the far right side. Then I came in with the same yellow that I used on the second coaster, leaving a gap between the yellow and black stripe. For the last details, I added lines on the far left side, and to keep the dot pattern going, and I added a few on the yellow stripe.
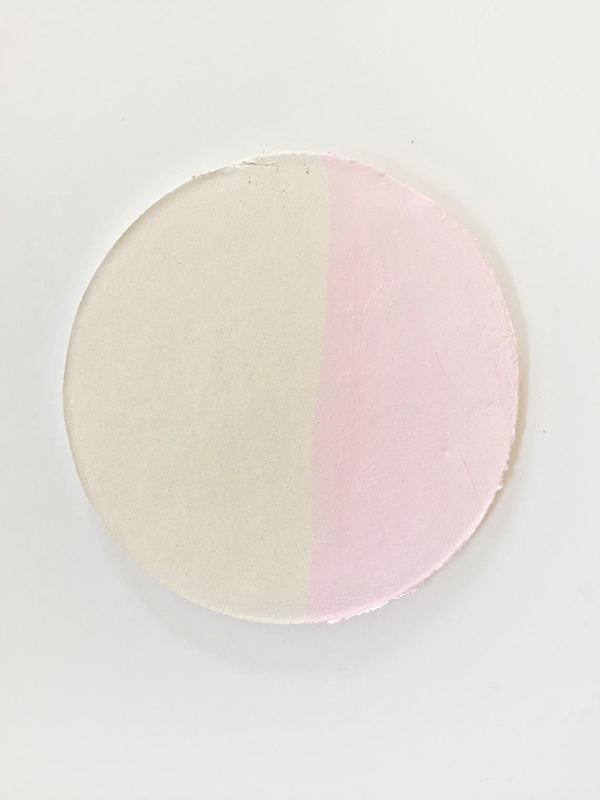
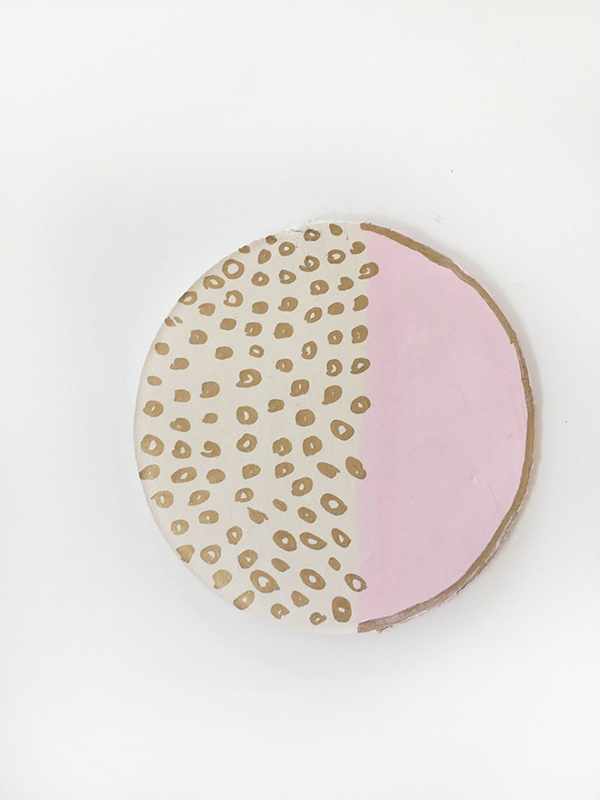
With this last design, I painted a sliver of pink and let that paint dry. Then I took my gold marker and started adding gold circles and spots on the white space, overlapping a bit on the pink. Finally, I outlined the outer edge of the pink side.
05. Let the paint dry.
06. To seal the coaster, hit the front and back with Crystal Clear, twice on both sides. Let it dry before using.
07. Enjoy a nice tall glass of your favorite beverage.

I’d love to see your Trinkets and Love DIYs. If you’ve made your own clay coasters, show me on Instagram using #mytrinketsandlove. Like what you see here? Follow along on Twitter and Pinterest and don’t forget to subscribe to the newsletter for exclusive access to the latest news!


4 Comments
Aaron (@1dish4the4road)
July 26, 2018 at 2:30 pm
Great looking design pieces!..
Deanna
July 31, 2018 at 9:26 pm
Thanks so much, Aaron!
Zhana Yordanova
July 27, 2018 at 4:29 am
Wow, they look so great! I’ve never make them, so I will try it
Deanna
July 31, 2018 at 9:26 pm
Thanks, Zhana! Be sure to show me if you give it a try!
Comments are closed.