
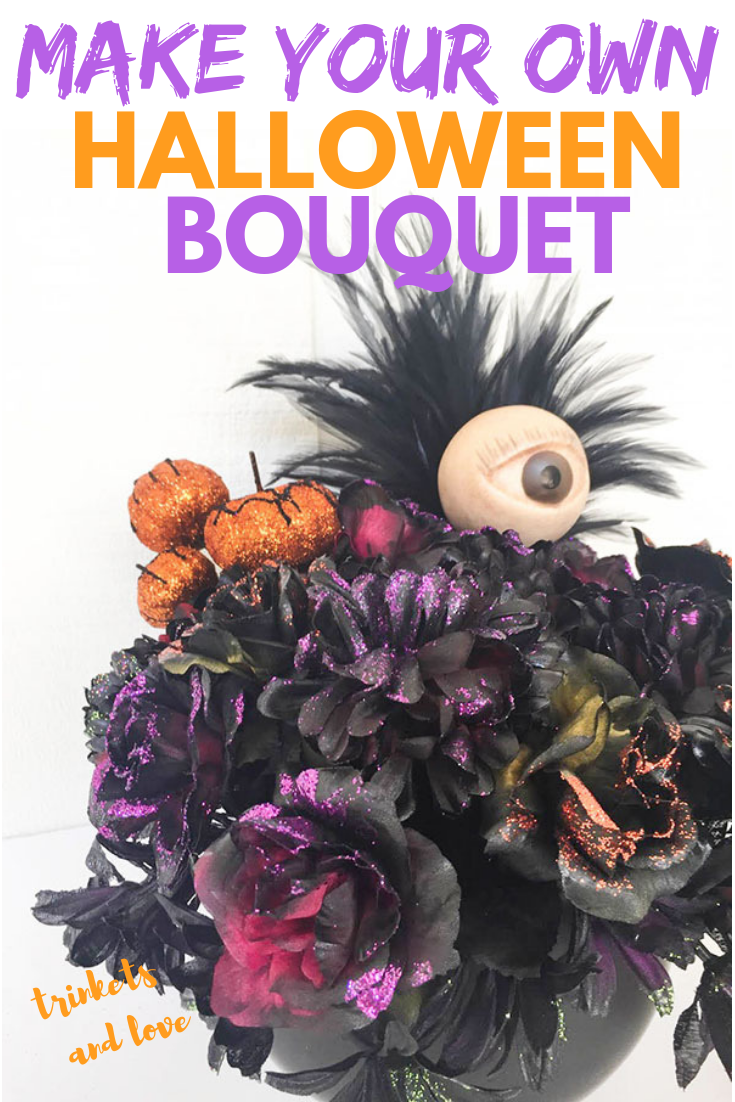
HALLOWEEN BOUQUET
How would you describe Halloween? Creepy, spooky, wicked? How about magical?! There is nothing I love more than celebrating this magical time of year, whether that involves decorating, baking treats, or having a Harry Potter marathon!
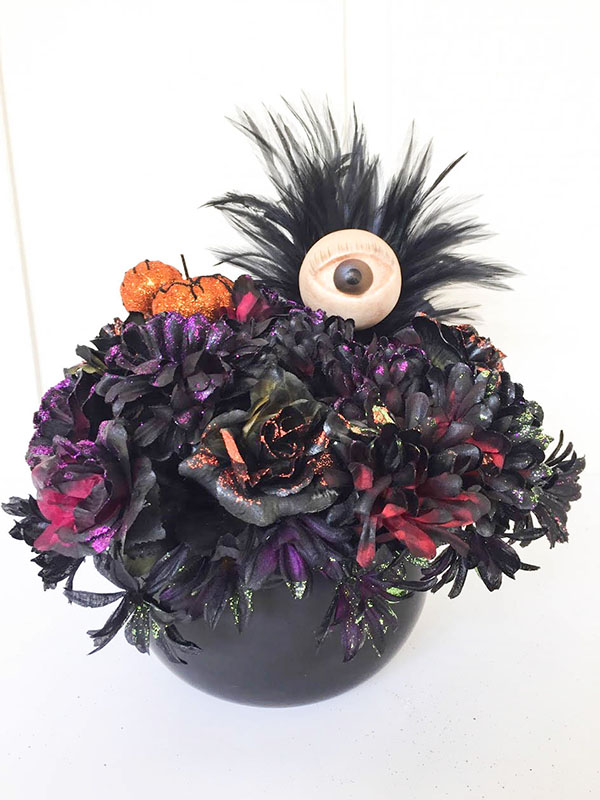
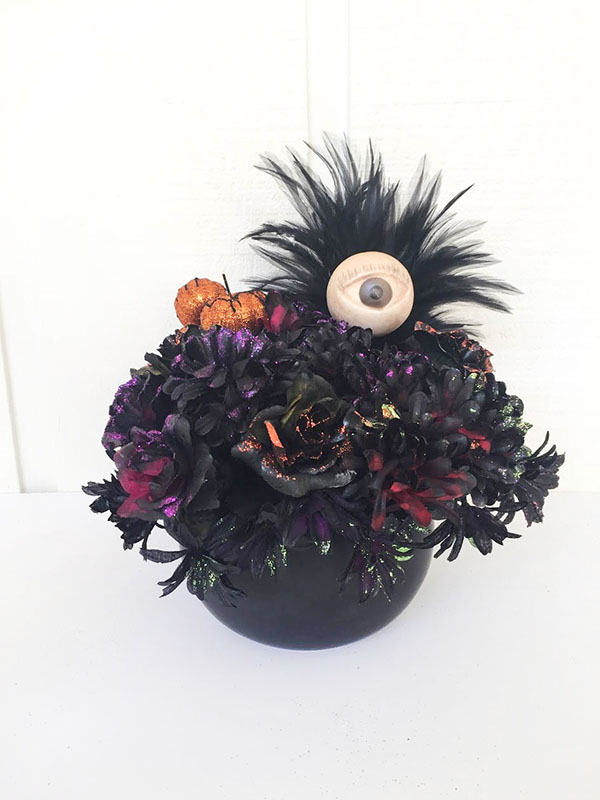
This year I fell in love with the idea of making a bubbling cauldron Halloween bouquet, after coming across a lovely ceramic cauldron in Target’s $1 spot! I picked it up and thought of those classic words, “Double, double toil and trouble; Fire burn and cauldron bubble!” I thought of different ways I could display the creepy, spooky, and wicked spirit of Halloween, but ultimately, I decided on this Halloween bouquet to show off the elegance and magic of the holiday!
Find out how you can put this Halloween bouquet together, with some fake flowers, a touch of paint and glitter, and a sprinkle of magic, below!
Supplies:
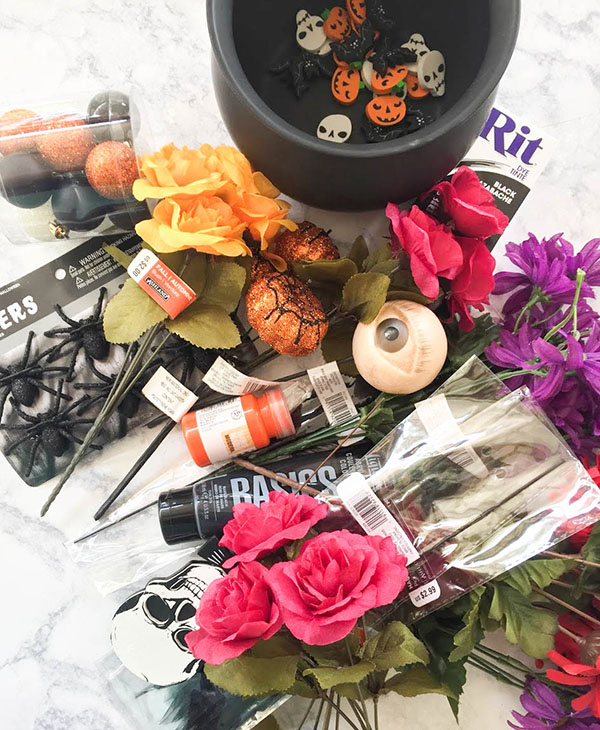
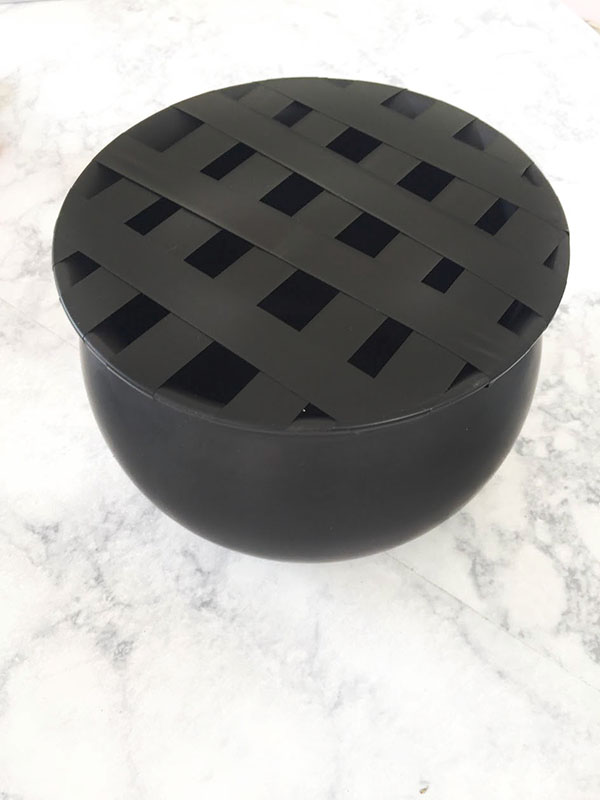
Ceramic or plastic cauldron ( I got mine from Target)
Tape
Fake Flowers in different sizes
Halloween Decorative Picks
Glitter – black, purple, green, orange
Halloween Bouquet:
Optional Steps to Start:
When I bought fake flowers for this project, I browsed the Halloween section at my local Michaels store. They had plenty of Halloween flowers, many pre-glittered. They were beautiful, but when I looked at the price tag, my heart sank. $6.00 for one flower? Yeah, no… I can fill my Halloween boutique for a lot less! I marched right over to the clearance section in the fake flower department. Here I found flowers in fall colors for $1.00 each! Grabbing handfuls of red, purples, and yellow flowers, I developed my plan to make my own sparkly Halloween boutique!
You may find that buying premade Halloween flowers fits your needs better, and that’s okay. If that is the case, just skip down to step 5 to learn more about arranging your Halloween boutique!
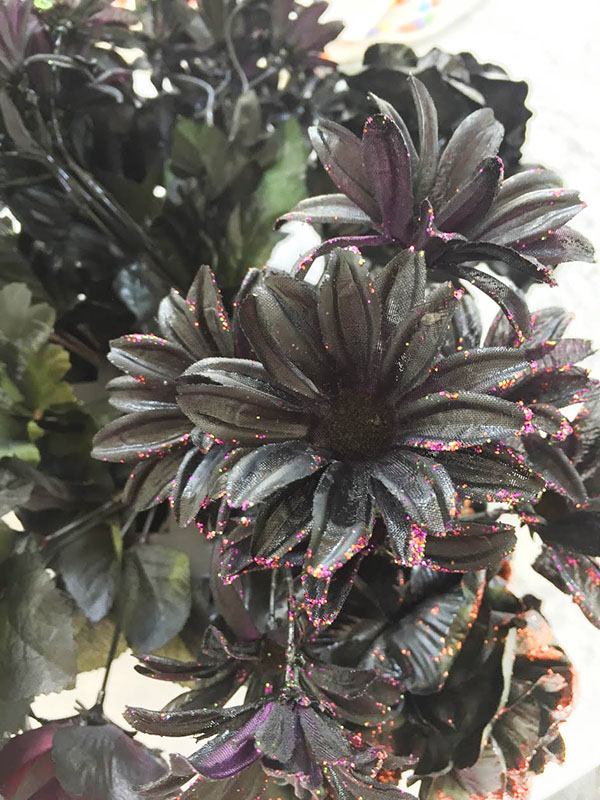
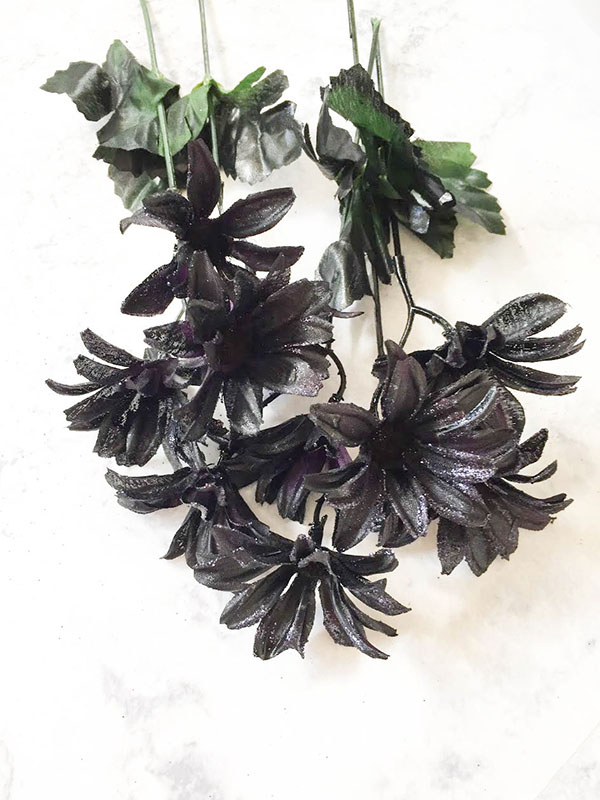
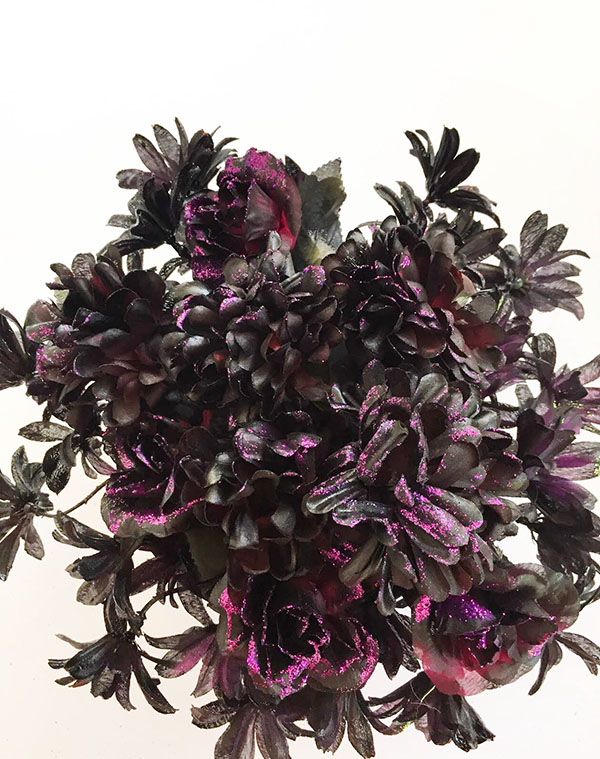
01. Lay out your fake flowers onto a flat surface and coat with black spray paint until you are happy with the coverage. I chose to keep some of the original color showing on the petals. I think this adds depth and an extra spooky look to the bouquet.
02. Now for the messy, but fun part, adding the glitter! I put together a little glitter station before I started, using a paint liner tray. I gathered my craft sponge and a little jar for my glue and set up my glitters inside the tray. Working over the tray, I dabbed glue around the edges of the flower petals and started sprinkling glitter on top, and shook off any excess into the tray. For the smaller flowers, I used some of this excess glitter to make multicolored flowers!

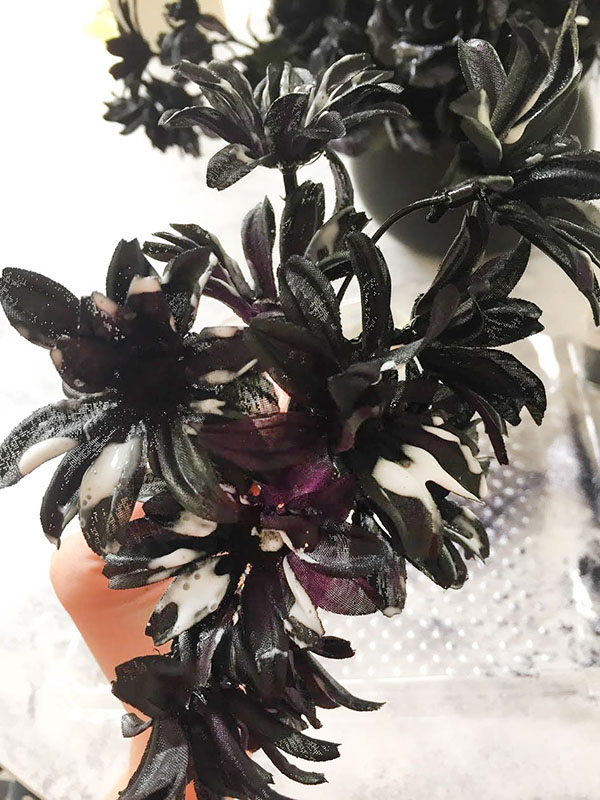
03. Set the flowers to the side, and use a wet paper towel to wipe off any extra glitter you may find on your crafting station…and you will find glitter (HA!)
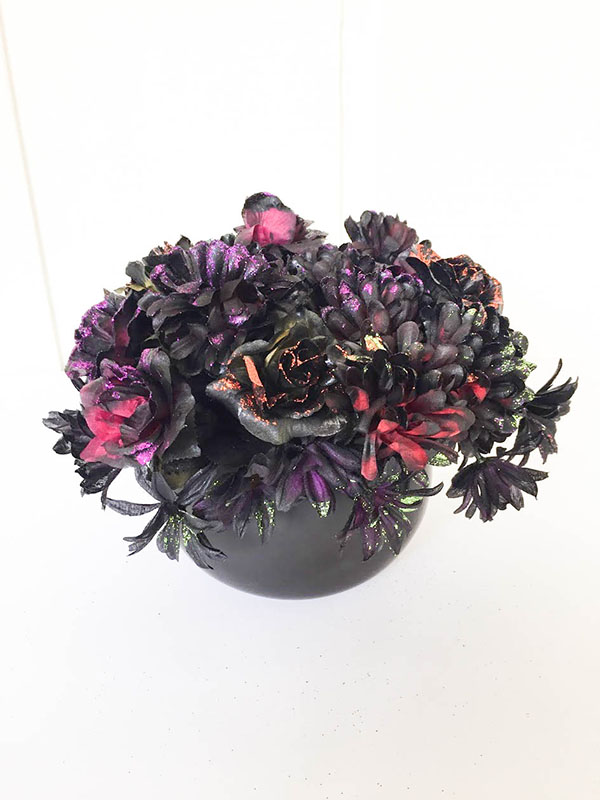
04. Using your tape (I used electrical tape so it would blend in, but scotch tape will work), create a grid on top of the opening of the cauldron
05. If you have flowers that are connected in a bundle, you will want to separate them into single flowers with a bit of a stem. I had to use a pair of gardening snippers to cut through the plastic stem that held them all together. Figure out how tall you will need the single flower stems to be and cut, removing any of the leaves if needed
06. Taking either your smallest flowers, or any decorative grasses/garland, start filling in the outer most slots in the tape grid – this is the foundation that you’ll build your bouquet from
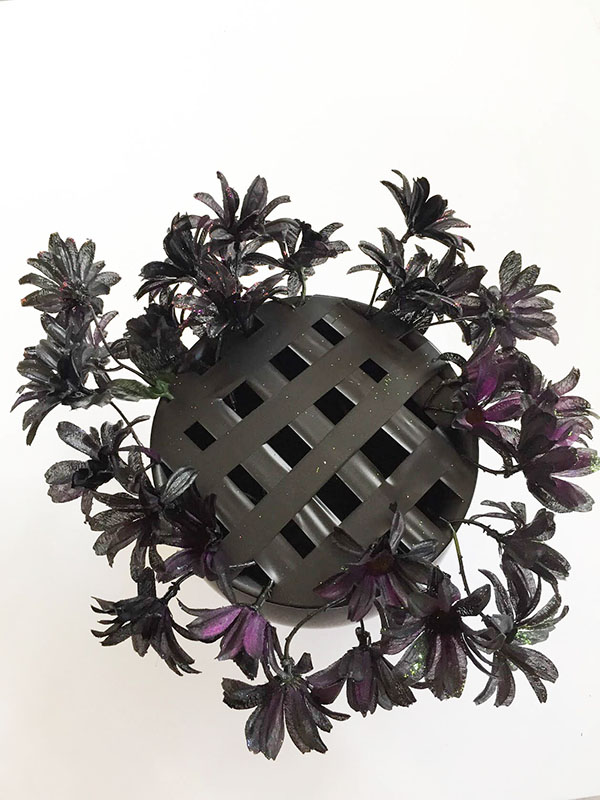
07. Then, using flowers that are the next size up and using the same color glitter, begin arranging them in the middle of the cauldron. These will look best when they have been spread apart from each other
08. Come in with the largest flowers you have and repeat the step above
09. Using leftover flowers, start to fill in any gaps there may be in your arrangement. You should not be able to see the tape grid
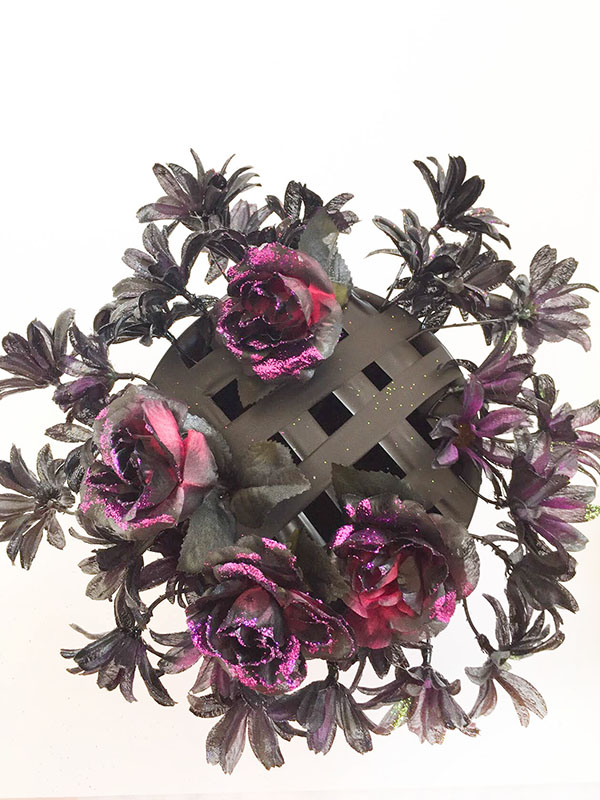
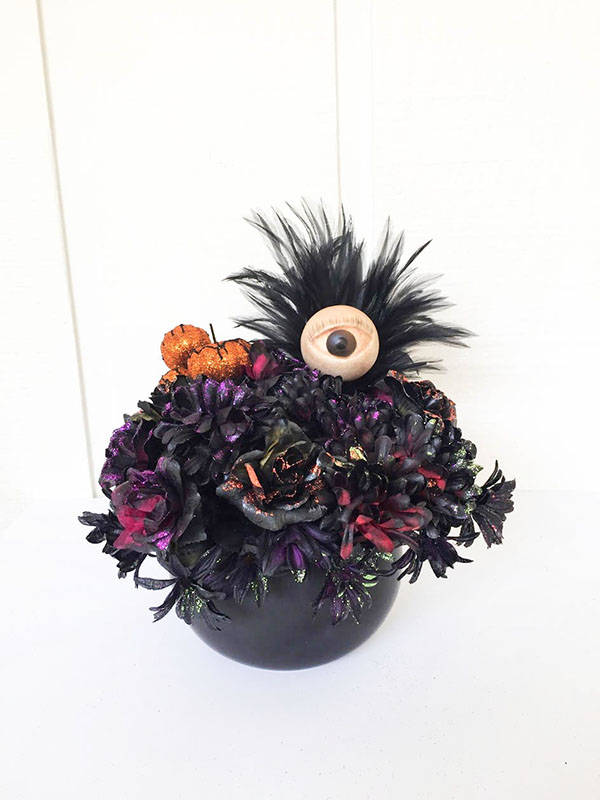
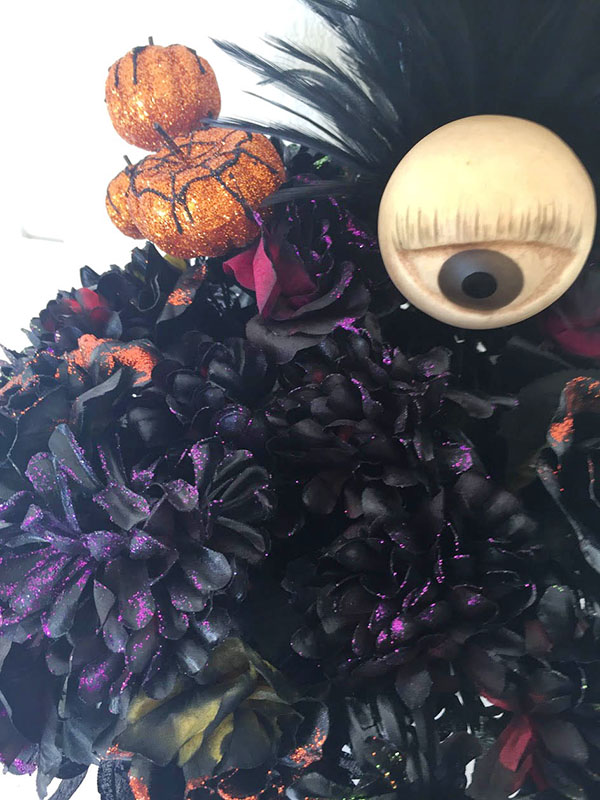
10. Lastly, we want to get some hight in the arrangement, and that is where the decorative picks come in. As you can see I added feather picks because they are tall and add a different texture, then I added the spooky eye. Lastly, I put in the pumpkin pick, because it stands out from the black flowers, and mimics the orange glitter on some of the flowers
I’d love to see your Trinkets and Love DIYs. If you’ve made your own Halloween Bouquet show me on Instagram using #mytrinketsandlove. Like what you see here? Follow along on Twitter, Facebook, and Pinterest and don’t forget to subscribe to the newsletter for exclusive access to the latest news!


4 Comments
Zdravka
October 7, 2018 at 12:54 pm
Looks amazing! Thanks for sharing.
Deanna
October 7, 2018 at 6:10 pm
I’m so glad you liked it!
Kippi
October 7, 2018 at 1:10 pm
I love Halloween and your how to I am going to try out. I hope mine looks as good as yours.
#kippiathome
Deanna
October 7, 2018 at 6:11 pm
Happy Halloween, Kippi!
Comments are closed.